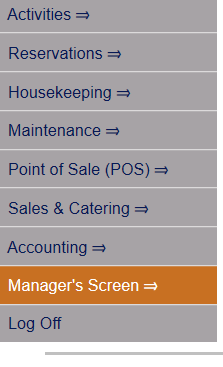
Select Managers Screen from the Quick Menu on the left side of the screen, then select Configuration > Sales and Catering =>.
Select Manager's Screen to be taken to the MANAGER'S COMMANDS screen.
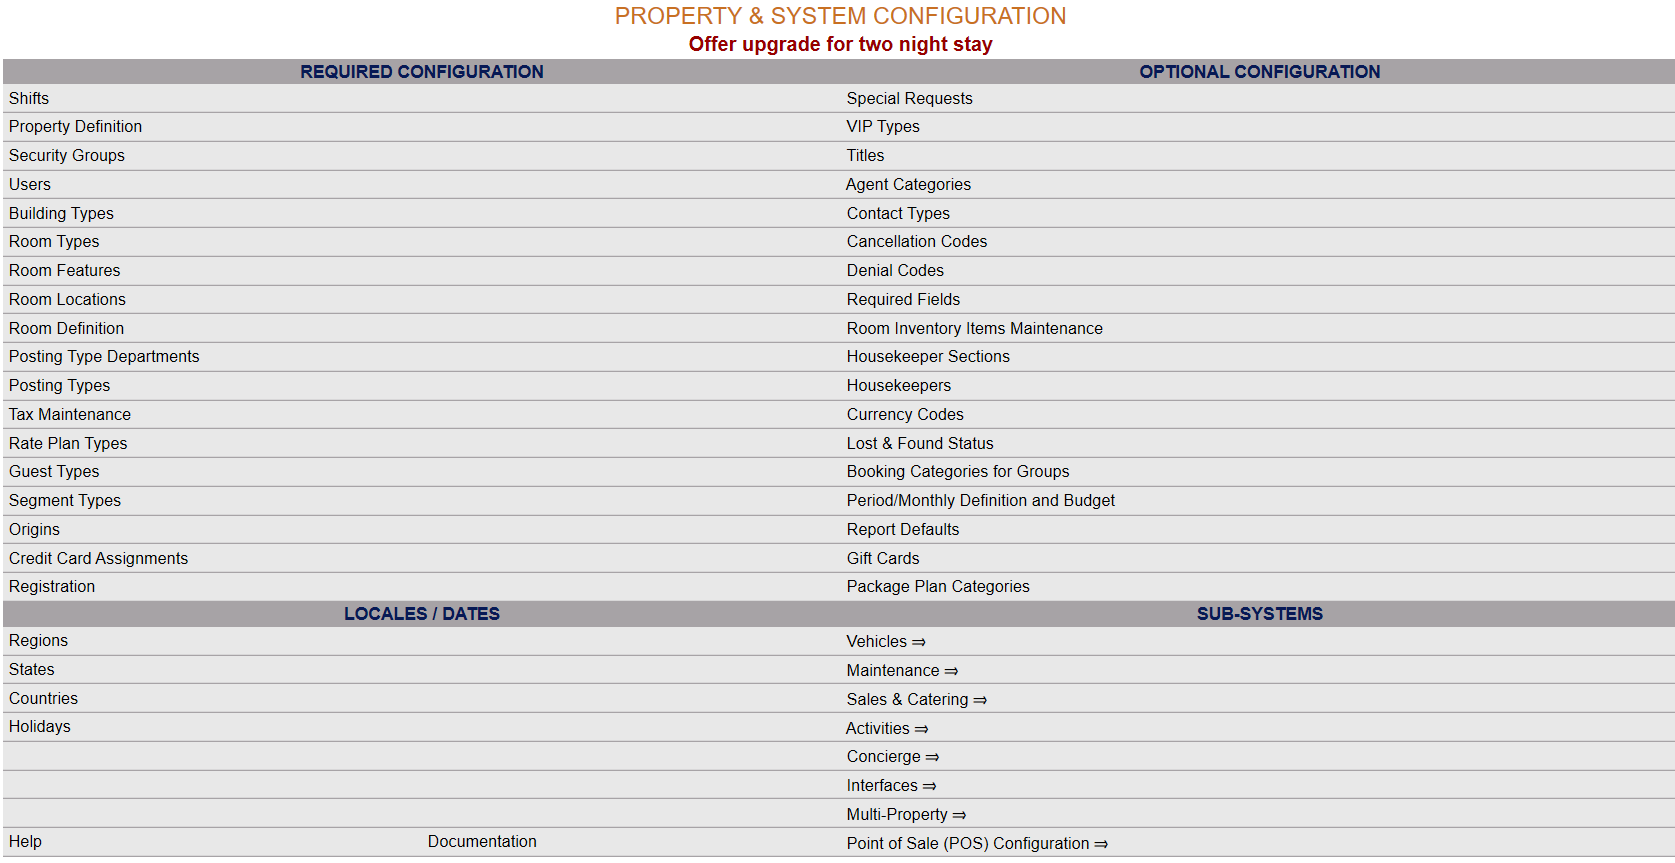
Select Configuration to be taken to the PROPERTY AND SYSTEM CONFIGURATION screen.
Alternately, you may also be able to select Configuration directly from the Quick Menu, if the menu has been set up to include the Configuration option.
This will take you to The Property System Configuration Menu.
The list of property configuration options are divided into four sections, which are Required Configuration, Optional Configuration, Locales/Dates and Sub-Systems.
Select Sales and Catering => from the Sub-Systems section.
This will open the Sales and Catering Configuration Menu.
The Sales and Catering Configuration Menu has four sections: Sales, Catering, Menus and Inventory.
Select Menus from the Menus section.
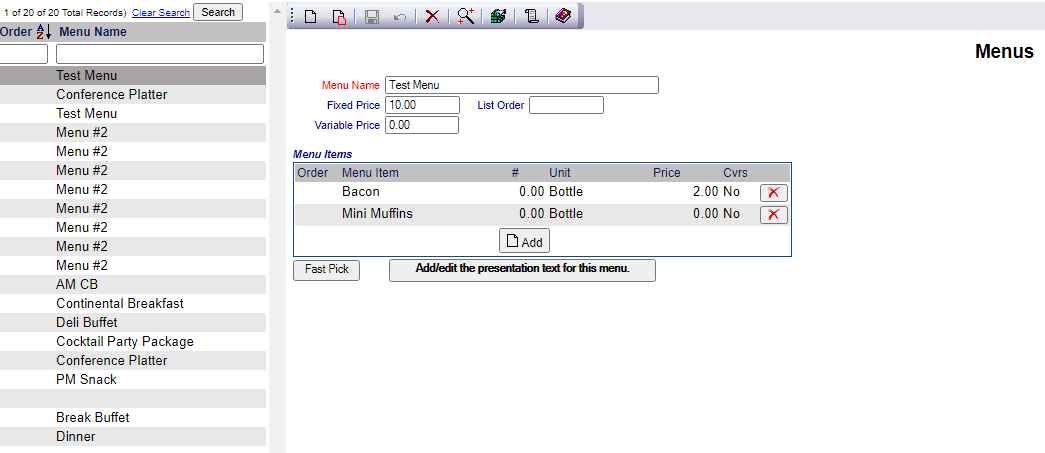
When opened, the Menus screen display is split into two frames, with the left side of the screen listing any already configured Menus for the Property and the right side containing the fields you need to complete in order to add or edit a Menu for the Property. Any changes made on the right, once saved, will be updated in the listings to the left. Enter the different Menus for your Property.
The currently configured options are displayed by:
Order: List Order of the Menus. This will display your Menus in the order you desire in the interface. If there is no list order number, the Menus will be displayed alphabetically.
Menu Name: The name given to the Menu
Your options include the following:
Generate a new entry:
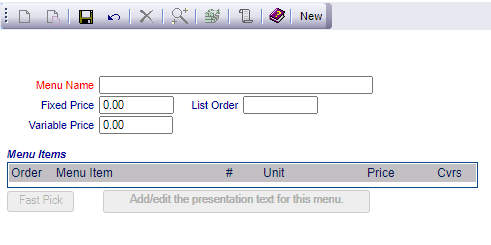
Click the New ![]() button from the toolbar to add a new Menu.
button from the toolbar to add a new Menu.
Complete the fields described below.
OR:
Select an existing Menu from the list on the left, and click the Replicate ![]() button from the toolbar. Then change the field information as described below.
button from the toolbar. Then change the field information as described below.
Edit the current selection:
Change the field information described below.
Menu Name: This should be the name of the Menu, that will be used in the interface when selecting options. Names should be easily recognizable by your staff.
This field is required.
Fixed Price: Fixed Menu Price. If the menu has a flat price associated with it that will not fluctuate based on the number of guests ("covers") attending the event, you should enter it in this field.
Variable Price: Variable Menu Price. If the price of this menu is variable enter the variable price per person or "cover" in this field, so the variable price is multiplied by the number of covers at an event for the total food revenue for this menu.
List Order: This determines in what order the Menu appears listed in the interface.
Enter a number into the List Order field.
This field is optional, however it we recommend that you list the Menu in the order you prefer. This makes it easier for staff to find the Menu they need in the interface.
When generating a new Menu, you will next need to click the save button (![]() ) in the local tool bar. This will save the Menu, updating the list shown on the left side of the screen and allowing you to add Menu Items to the Menu using the Menu Items section.
) in the local tool bar. This will save the Menu, updating the list shown on the left side of the screen and allowing you to add Menu Items to the Menu using the Menu Items section.
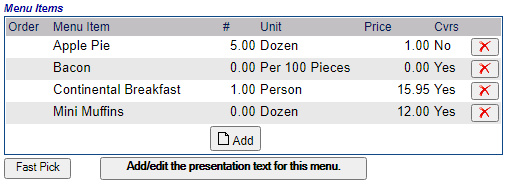
When you first add a Menu, this section will be empty. Menu Items need to be added into this section to allow you to use them with the specified Menu. You will need to click the gray Add button to add any desired Menu Items.
Note: When generating a NEW Menu, the Add, Fast Pick and Add/Edit Presentation buttons in this section will NOT be available until AFTER the Menu has been saved.
Saving the Menu will generate an entry for it on the left side for the Menus screen, make the Add button visible and the Fast Pick and Add/Edit Presentation buttons live.
Clicking the Add button opens the POS Items screen, where you can select the Menu Item you wish to add to the menu, as well as modify any of the default unit types, price and presentation selected during its configuration.
Note: Be sure to click the save button in the local tool bar to add/update the Menu Item on the list to the left, FOLLOWED BY the new or replicate button for each additional Menu Item you add to the Menu (else you will be REPLACING the Menu Item on the Menu, not adding subsequent ones).
POS Item: This is a drop-down menu of all possible POS/Menu Items that could be added to the menu. Select the desired item.
This field is required.
List Order: Enter a number into the List Order field. This field is optional. If no order is specified, the items will be listed alphabetically when viewing this menu in the interface.
Note: Selecting your POS/Menu Item will AUTOMATICALLY COMPLETE the subsequent fields on this screen with the information entered when the item was configured. You may however edit the fields as you desire - for this Menu ONLY - here.
Unit Type: This drop-down menu is the Units of Measure to be used for this item and is used to indicate how the item is to be sold (per dozen, gallon, bottle, etc) on this menu. Select one.
This field is required.
Number of Units: Enter how many units of the item will be used on this menu.
By Covers: This box may be checked or unchecked. You can check the By Covers box to multiply the price of the item by the number of guests ("covers") attending the event for a total forecasted food revenue.
NOTE:: If By Covers is not checked, the price is a fixed fee. The food revenue for this item does not fluctuate based on the number of guests attending the event.
Price: Price of the item charged to the guest.
Cost: Cost of the item to your Property.
Presentation: Presentation for this item on the BEO. Enter any descriptive information about this menu item that the client should see on the BEO.
When you are finished adding or editing a POS/Menu Item for the Menu, click the save button (![]() ) in the local tool bar.
) in the local tool bar.
Once you have finished adding all the POS/Menu Items for the Menu, click the Menu button in the local tool bar to return to the Menu screen for the attached Menu.
The Menu Items section of the Menu screen will now show the added Menu Item listed.
As throughout Skyware Systems, any entry in this box can be deleted by clicking the delete button to the right of the entry to remove it.
To add items to your Menus more quickly, you may use the gray Fast Pick button below the Menu Item section instead of the Add button within it.
This will open a separate Fast Pick window, which lists ALL the POS/Menu items that have been configured as having a Unit of Measure associated with them, with a field to the left for the number of units. If an item was configured as having multiple possible units of measure (for example, by the bottle AND by the case) it will have a Fast Pick entry for each possible Unit of Measure.
Select any items that you wish to have added to the menu by entering the required number of units into the unit field. (By default, the value is 0).
When you have entered all the numbers, click the orange button Save and Exit to return to the Menu screen.
The Menu Items section of the Menu screen will now show the added Menu Items listed.
You can further constrain this window to show items within specific Pick Categories, Display Categories and/or Food Types only, allowing you to efficiently list the relevant items and making your selection choice simple. Using the Fast Pick option allows you to add multiple items at one time, generating your menu swiftly.
Note: Fast Pick allows you to select the menu items only, you cannot modify any of the default unit types, price and presentation selected during their configuration. If you desire to do so, you will need to use the Add button in the Menu Item section and adjust the relevant field for the individual menu item(s), one at a time.
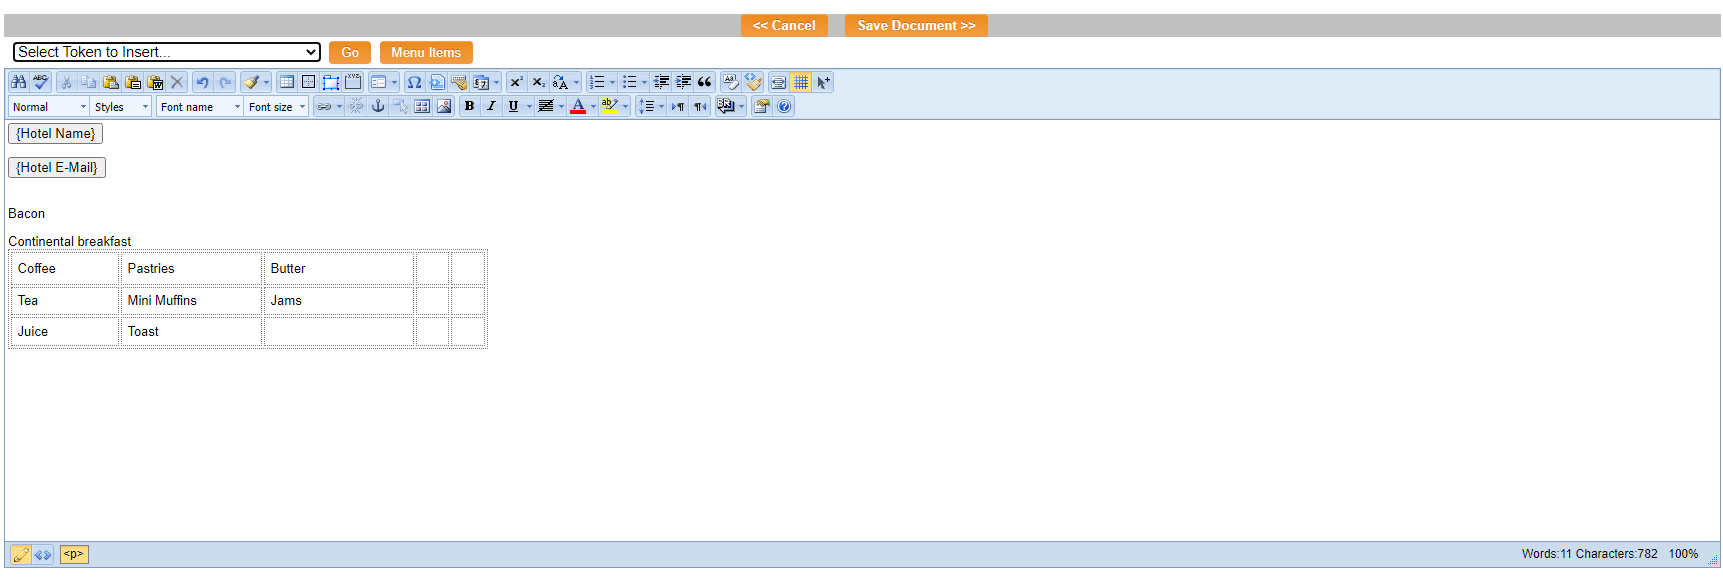
The presentation field for your specific menu items on a Menu allows you to add any descriptive information about the menu item that the client should see on the Banquet Event Order. However, you may also wish to have a description added for this Menu as a whole. In this case, you may use the button Add/Edit Presentation for this Menu.
This opens a customized document screen that allows you to generate and format (insert various tokens, add a table, font style, etc.) the presentation of the Menu that appears on the BEO that the guest sees.
When you finish editing the menu, click the orange button Save Document >> to return to the Menu screen.
